
DIY Pinstripe Tape Roll Installation: A Step-by-Step Guide
Posted by Kevin Messina on 2nd Apr 2025
Adding a pinstripe tape roll to your vehicle, boat, or RV is a great way to enhance its appearance and make it stand out. With the right tools and a little patience, you can install pinstriping yourself and save money on professional services. This comprehensive guide will walk you through everything you need to know about Pinstripe Tape Roll Installation to ensure a clean, straight, and long-lasting finish.
What You Need Before You Begin
Before jumping into the installation process, it’s important to gather the necessary tools and prepare the surface to ensure optimal adhesion.
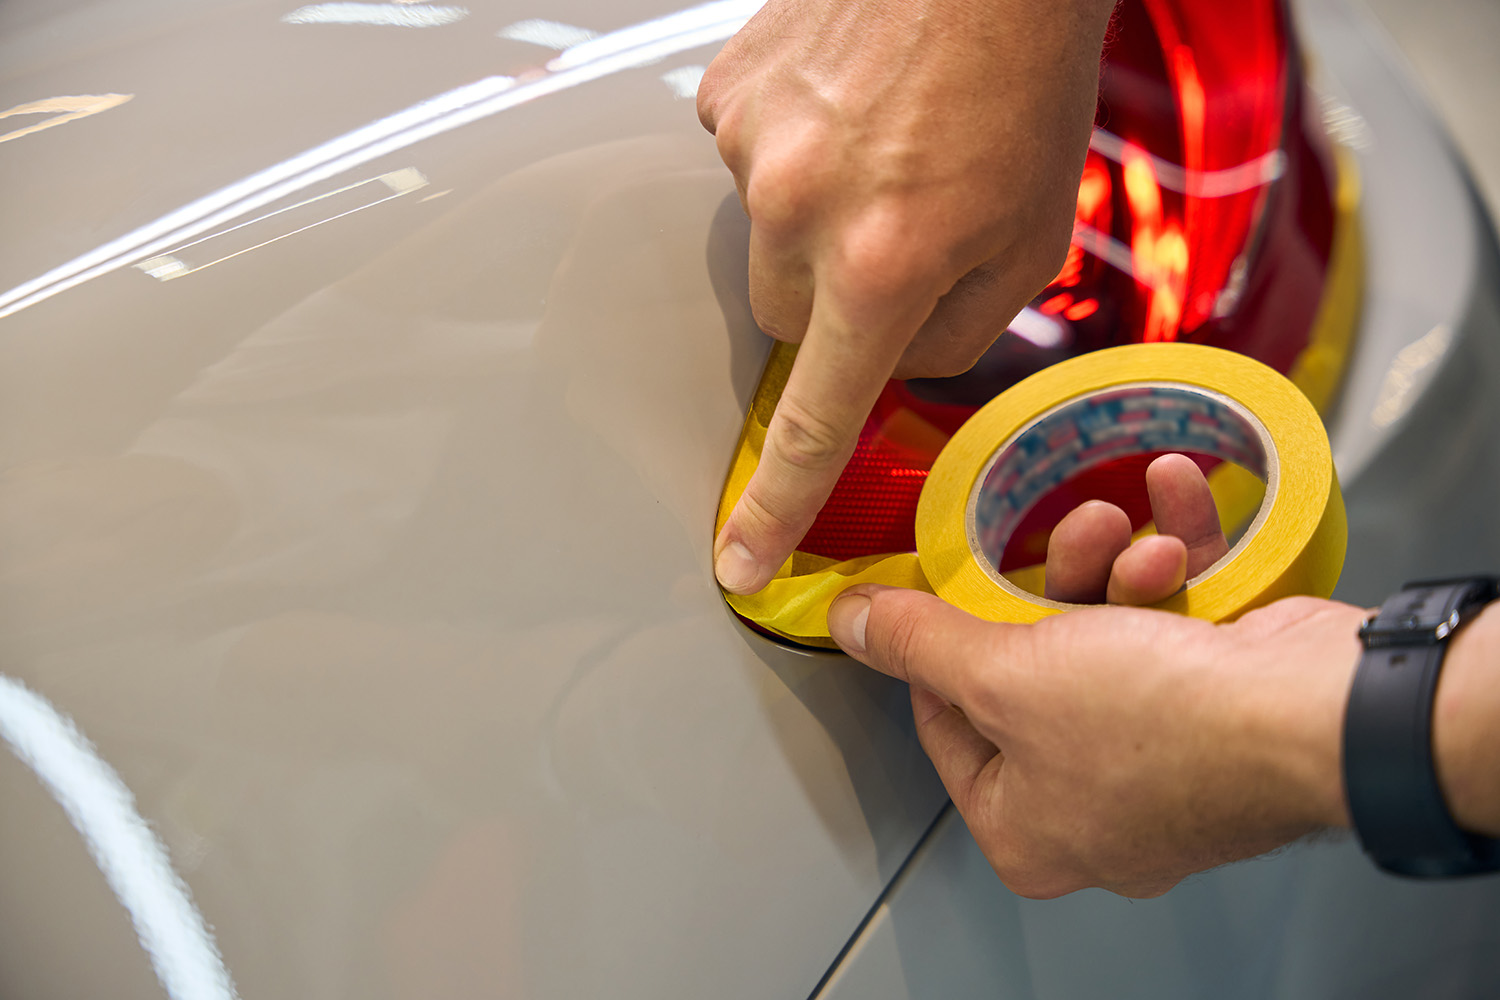
Tools and Supplies:
-
Pinstripe tape roll (choose your color and width)
-
Masking tape
-
Measuring tape or ruler
-
Wax and grease remover
-
Clean lint-free cloths
-
Utility knife or scissors
-
Squeegee or felt-edge applicator
-
Heat gun or hairdryer (optional)
Surface Preparation:
-
Wash the surface thoroughly to remove dirt and grime.
-
Wipe the application area with a wax and grease remover.
-
Dry completely using a clean, lint-free towel.
-
Ensure the surface is smooth and cool to the touch before applying the tape.
Step-by-Step Pinstripe Tape Roll Installation
1. Plan Your Design
Decide where the pinstripe will go. Use masking tape to mark the area and visualize the layout. Measure for symmetry and balance.
2. Align the Tape
Start at one end and slowly unroll the pinstripe tape along the guide line you've created with masking tape. Align it carefully to avoid crooked lines.
3. Apply the Tape
As you apply, press the tape down lightly with your fingers to secure it in place. Use a squeegee or felt applicator to smooth out the tape and remove air bubbles.
4. Trim Excess Tape
Use a sharp utility knife or scissors to trim the ends cleanly. Be cautious not to cut into the surface beneath the tape.
5. Seal the Edges
Use a heat gun or hairdryer on a low setting to gently warm the tape. This helps activate the adhesive and improve bonding. Press down the edges firmly.
6. Final Inspection
Check for any air bubbles or loose edges. Smooth out imperfections and ensure everything is securely in place.
Common Mistakes to Avoid
Even simple DIY projects can go awry if you’re not careful. Here are some common mistakes and how to avoid them:
-
Skipping Surface Prep: Applying tape to a dirty or waxed surface can prevent proper adhesion.
-
Applying in Direct Sunlight: High heat can cause the adhesive to soften prematurely and make alignment difficult.
-
Stretching the Tape: Pulling the tape too tightly during application can lead to shrinkage or peeling later.
-
Not Measuring Properly: Uneven lines or off-center placement can ruin the aesthetic.
Tips for Long-Lasting Results
-
Wait at least 24 hours before washing the vehicle.
-
Avoid high-pressure car washes for the first week.
-
Use vinyl-safe cleaners when washing.
-
Park in shaded areas to prolong the life of the tape.
-
Reapply edge sealing with heat if tape starts lifting over time.
Frequently Asked Questions (FAQs)
1. How long does pinstripe tape last?
With proper installation and care, pinstripe tape can last 5 to 7 years or longer, depending on environmental conditions and exposure.
2. Can I remove and reposition the tape during installation?
You can lift and reposition the tape during the initial application, but repeated adjustments may weaken the adhesive. Work slowly and carefully.
3. Will pinstripe tape damage my paint?
No, high-quality pinstripe tape is designed not to damage factory paint when removed properly. Always test a small area first if unsure.
4. What temperatures are best for installation?
Ideal temperature is between 60°F and 80°F. Avoid installing in extreme heat or cold for best results.
5. Can I apply pinstripe tape to curved surfaces?
Yes, but it requires extra care. Use small sections and apply heat to make the tape more flexible and easier to contour.
With the right tools and techniques, Pinstripe Tape Roll Installation can be a rewarding DIY project that enhances your vehicle's aesthetics. Follow these steps and avoid common pitfalls to achieve a professional finish without the professional price tag.

